

It has been awhile since I made a post, but when Molly put it out there that she was organizing a Summer Blog Tour for George + Ginger (personal favorite of mine) I knew I needed to get these fingers tickling the keys(board) again!
Welcome to Day One of the Festival Fever Blog Tour! What can you expect along the way? Well I can’t tell you for sure, but I know you will find a bit of spunk, a lot of creativity, and if you check in over at the George + Ginger Blog you may even find a giveaway or two. I am in great company today and you can check out the full line up at the bottom of this post!
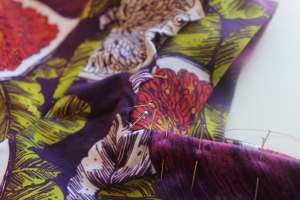
That brings me to why you are here, my sensational vintage style take on George + Ginger’s Rave Top featuring Fig fabric from Sugar Ink Fabric (aff link)! (Currently on pre-order until June 23).
*Disclaimer: the scale of the Figs was too big in this strike off fabric and will be a smaller size in the final fabrics.
Summer in the South means a lot of festivals. Strawberry Festivals, Music Festivals, BBQ Cook-offs, Fried Pickle Festivals (Tennessee I am looking at you…See you in September), shoot we just went to NASA in the Park this past weekend with Toddler Beast and that was really cool for me since my Pappy worked for NASA in Virginia! If you have an interest, there is a festival for that I’m sure. But one of my absolute favorite things in Summer is the good ol’ Farmer’s Markets! Down here you can find one AT LEAST 3-4 days of the week. Usually early mornings until about noon, or in the evenings when temps are finally dipping back into the 80’s. I love that I can divvy up my grocery budget for some fresh local produce and canned goods instead of grabbing everything at the store. It all just tastes a little sweeter when you have to clean the dirt off of it yourself.


I couldn’t think of a better place to wear this vibrant Fig fabric then the place where you can actually find figs…fresh, jam, jelly, butter, sauce… you get the picture. The day we went to snap some pictures (sorry to EVERYONE there who wondered who the paparazzi was lol) There was actually someone set up that was…. Fig Leaf Farms! It just seemed meant to be!

A great fabric needs a great pattern to show it off, and I got such a vintage vibe handling it that I knew I wanted that Summer Sweetheart/Farmer’s Daughter style look. So I took one of my favorite patterns, George + Ginger Rave Shirt, to the drawing board (literally) and I came up with this!
Since I adore Kristi, and respect her hard work that goes into her designs, I will not be showing any of the full pattern pieces. If you need help after following along, you can always find me over in the George + Ginger Pattern Group on Facebook and I’ll be happy to help you out!
To recreate this look, you will need your Rave Shirt with the Square Neckline. I LOVE this neckline. It was the one I got to use during testing and even though those corners were a learning curve for me (imagine 4 v-necks….yikes), I adore the clean lines look.
Tape and Cut your pattern like you normally would. You will need to make some additions after all your usual adjustments for height and grading.
For the front and back of the neckline, I did a binding rather than the regular neckline. I wanted that clean line across the front and back instead of the thicker neckband. So to compensate, I taped the neckband pieces to the bodice piece. (I did have to add a little extra with some scrap paper). Originally I thought I could just do a binding/facing all the way around; but my first assembled fit check showed me real quick I would need a way to pull the shirt in together more on the shoulders to keep it on. So that cute shoulder/bodice detail ended up being a happy accident!


You can see here I have my bodice pieces and sleeves cut out and ready to go! At this point you should use a straight pin or clip to find and mark the middle of your bodice front neckline. Trust me.
Next I cut out 2 pieces the same size as “Front/Back” Neckband pieces. These I used as the binding. I sewed them, right sides together, along the top edge of the front and back neckline. I pressed the seam down to lay flat on the wrong side of the bodice. Then I folded the binding over twice, encompassing the seam, and pinned it. You could baste it in place if you wanted to, but since I was kind of winging this as I went, I just pinned it to death and waited to see what would happen.


Next I added the neckband pieces for the shoulders. I cut the pieces (2, one for each shoulder) slightly shorter than the original neckband pieces to compensate for the fact I originally already added some length to the fabric in the neckline. I knew I needed to pull the neckline together so I wanted to make sure it had some ease.
This is where it got fun. I’m not going to lie, it probably took me a good hour or two to figure out this next step. Could be it was legit tricky, could be I was in Mombie mode, could be I really had NO idea what I was doing…. But eventually I came up with this plan AND. I. LOVED. IT.
So, my issue was how to create the look I wanted without having an exposed seam on the shoulders. Solution? I made an itsy bitsy snip into the corner of the neckline at the base of each shoulder (front and back). This allowed me to fold those sides back. I took the neckband pieces I cut out and folded them in half long ways, wrong sides together. Then I lined them up raw edges of the neckband and bodice; with the right side of the neckband against the wrong side of the bodice neckline. I scooted the neckband back just enough that I was able to fold the small edge of the neckline OVER the raw edge of the neckband.
-I was totally winging this ya’ll…. I mean WINGING it… like applying eye liner, in the car, on a bumpy back road, with a dirty mirror. Could cut you, could be a disaster, won’t know til it’s over.-
Using a stretch stitch, I sewed the shoulder bands (as I call them now) into place. I brought my stitch down and around towards my front and back necklines in a neat little angle just to catch that edge I had snipped. I ended up really loving this detail as it looks almost decorative.


Next I flipped the shoulder bands out and pressed them. (Because of the length I cut the bands, I got sort of wavy look on my shoulders. I wish I could say it was intentional, but it wasn’t. But once again, HAPPY ACCIDENT!) After pressing the bands out, I top stitched ALL the way around the neckline close to the seams. This ensured my bands stayed out and laid flat behind the front and back bodice lining. This is also the only stitch I put in the front neckline. For the back I did add a second row just to keep it from flipping over.
Now you can see my pretty square neckline! I almost left it like this. ALMOST.

For the next step, I made a small amount of tubing. I cut a piece about 2.5″ wide and probably about 8″ long. I wasn’t sure how long I would need it to be so I wanted to have plenty to play with. I sewed the tube along three sides, enclosing the one end, and turned it right side out. I pressed it flat, making sure the seam was in the middle of the back side.
This is where that middle marker on your front bodice neckline will come in handy. Using that middle marker, you want to stitch the enclosed end of the tube to the right side of the front bodice fabric about 3-4″ down from the neckline (see picture above for my pink and yellow markers). This can really vary by bust size and how deep of a neckline you want. I would advise trying the shirt on and pinching it together in the front to see where it will lay best for you. Make sure you stitch the tube so that it is right side against the bodice, open end pointing down towards the hem of the shirt. That way when you flip it up, it is folding over itself, hiding the edge and extending OVER the neckline and into the shirt.
  Once you flip it over, pull your tube down to meet the stitching on the inside of the shirt. I hand stitched it in place at this point. There may be an easier method, but this worked for me. I made sure to stitch in the seam of where the tube meets the bodice so there were no obvious stitches from the front. Then I trimmed my tube end and VOILA! Va Va Voom Retro Beauty.
I rocked my shirt to the market with some denim shorts and my boots. But it also pairs perfectly with its original partner, the Riot Skirt! For when I’m feeling extra sassy, I made a complementary one using the fitted skirt, flounce, and crossover waistband (slightly modified to add buttons later). You can purchase the Rave and Riot individually or as a bundle if you Click here (aff link)_!


Well, that’s about all the time I have for now! I hope this inspired you to make some SWEETheart style shirts as well!
As always, my posts may include affiliate links. By purchasing an item from them I will receive a small commission from your sale. Thank you for supporting me in my sewing obsession!
If you liked this post comment or interact below, follow me on Instagram (@bellephant_kel), or come see me in the G+G Facebook Group and let me know! I will try to post another one soon!
Caught the fever? Check out all the amazing looks in the Festival Fever line up!
Monday, June 18
Confessions of the Pink Obsessed | Diskordia’s Curvy Sewing
Our Play Palace | Wild & Wanderful | Bellephant
Tuesday, June 19
Threadistry | Cross Stitches | Middle River Studio
Liviality | Threads of Magic
Wednesday, June 20
Seams Sew Lo | So Sara Sews | Tenille’s Threads
My Crazy Crafty Beautiful Life | Aurora Design
Thursday, June 21
Middle River Studio | The Needle and the Belle
Sweet Mama Life | Sewing Scientist
Friday, June 22
Sewing Ambi | 52 Week Sewing Challenge
Needles to Say | My Sewing Roots
So Today I Did a Thing
And special thanks to our tour sponsors!
Boho Fabrics | Sincerely Rylee | Wandering Willow Design | Aurora Designs

Okay, I thought the top was adorable with jean shorts. But then BAM! That skirt with it…..so stinking gorgeous!!
LikeLike
I love food themed clothing! 😀
LikeLike
I absolutely love you’re entire outfit that you posted in the group. I love farmer’s markets also.
LikeLike
Very nice color contrast with the top and the skirt together! I really like it!
LikeLike
That rave is amazing and I for sure need the riot now! I love how you dressed it up and down showing such versatility with the pattern. Also I am sad that the figs will be scaled down because the printbis fantastic! I love the looks you created, so fun.
LikeLike
Ummm, I want to go to a fried pickle festival!!!
This is gorgeous- I love the dress it up or dress it down factor! And your pics at the farmer’s market warm my heart ❤
LikeLike
Love this…such a flattering bodice!
LikeLike
Wow! I love everything about this, your neckline is just so beautiful – and I also love the figs, the colours are beautiful
LikeLike
Such a gorgeous skirt and shirt. I absolutely love it!
LikeLike